Just incase anyone else gets one and wants to know what to do - i'm gonna jott my notes here (I'm making a LAMP box).
Step 0 - Buying Stuff
The Pi does not come with flash card & power - i decided to go with the following:
http://www.amazon.co.uk/Kingston-Tech...B004TS1IFK - Kingston Technology 32GB Full Size SDHC Class 10 Flash Card
http://www.amazon.co.uk/Nokia-AC-10X-...B007W3F6CA - Nokia AC-10X Micro USB Charger for Nokia Lumia 710 (5v 1500ma)
You need a micro usb charger (not mini usb) that does 5v and at least 750ma
In regards to the SD card, the debian image requires a card of at least 2GB, if you get a bigger one make sure you have a SDHC card reader etc.
You'll also need a HDMI cable (and ethernet cable)
I found the Pi to be very picky about power and SD cards (2 old ones i had didnt work), there is a list of tested cards & power supplies however:
http://elinux.org/RPi_VerifiedPeriphe...s#SD_cards - the amazon card i linked above is on this list.
Step 1 - flashing the card:
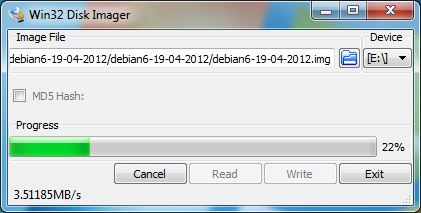
First, i downloaded Win32 Disk Imager: http://www.softpedia.com/get/CD-DVD-T...ager.shtml
Second, i downloaded the Debian “squeeze” image: http://www.raspberrypi.org/downloads & extracted the img file
I then wrote the image onto the SD card using Win32 Disk Imager:
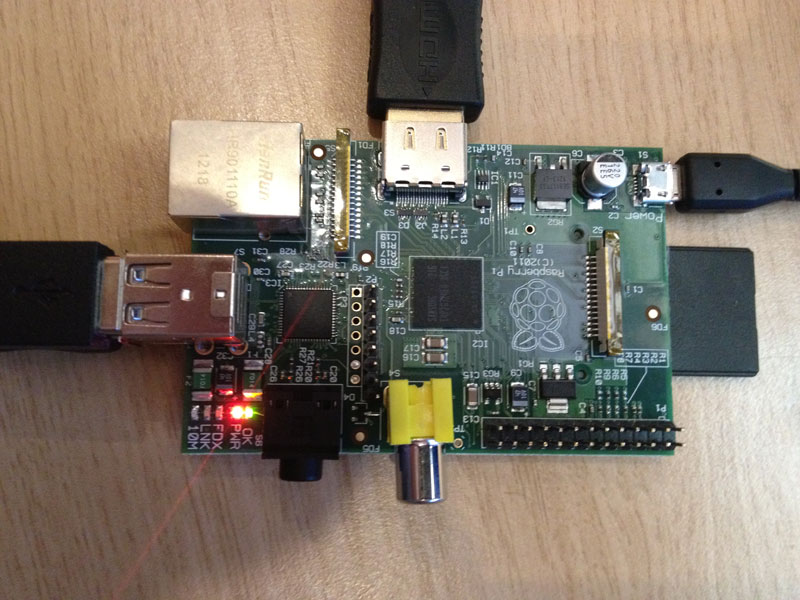
I then inserted the card into the pi, plugged in the hdmi, keyboard & power:
Step 2 - Logging in and testing GUI:
Logged in with the default debian squeeze credentials: (i'll change this password later - Step 6)
Username: pi
Password: raspberry
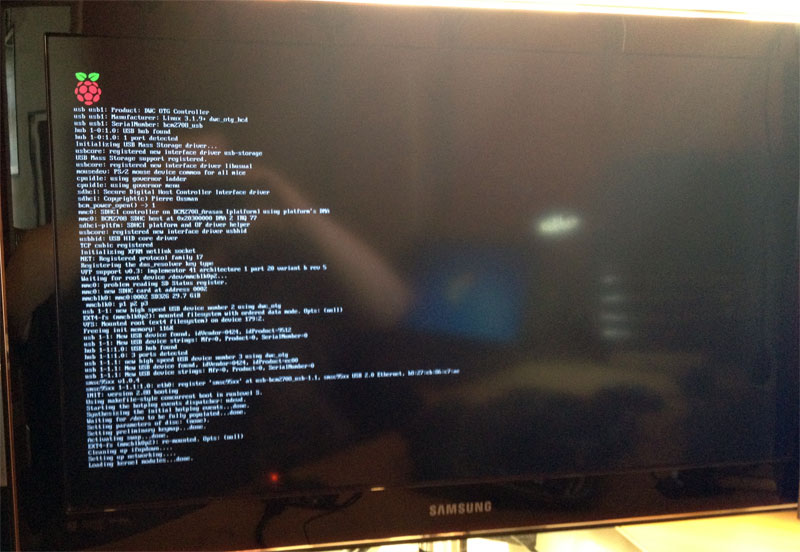
Once at the standard linux prompt "pi@raspberrypi:~$" - type the following to start the GUI:
after 10 seconds or so you should be in the GUI.
This is probably the last time i'll ever use the gui *facedesk*

Step 3 - Connecting (and enabling) via SSH:
I prefer to keep the pi in another room with no keyboard & mouse, i'll controll it using SSH (via putty)
- Shutdown the pi
- Attached a network cable (miles easier that wifi at this stage)
- Booted & logged back in
- sudo bash
- ssh-keygen -t rsa
- sudo mv /boot/boot_enable_ssh.rc /boot/boot.rc
Next, i get the IP using:
Then, over on the windows PC i connect using Putty (Download: http://www.chiark.greenend.org.uk/~sg...nload.html)

Step 4 - Setting static IP
I dont want the pi to get a DHCP address as this could change, so we configure the pi to use a static IP:
- cd /etc/network (Change dir)
- ls -l (Note: interfaces)
- more interfaces (opens the file, note the DHCP setting on the ethernet line
- sudo nano interfaces (opens the file in an editor)
- use arrow keys to put your cursor at dhcp and replace with the word static
- add the following lines underneath (making sure to use the IP it's currently using - see step 3.4)
   address 192.168.0.111

   netmask 255.255.255.0

   network 192.168.0.0

   broadcast 192.168.0.255

   gateway 192.168.0.1
- Hit Ctrl+X to exit, when prompted to save hit Y then Enter to confirm the filename
- Repeat step 3 to double check everything saved OK
- reboot the box (sudo reboot)
Step 5 - Changing hostname
I have a naming convention on my network (so i can easily spot unknown devices - so to change the hostname:
- sudo nano /etc/hostname
- Change the hostname
- Hit Ctrl+X to exit, when prompted to save hit Y then Enter to confirm the filename
- sudo /etc/init.d/hostname.sh start
- hostname (just to confirm) (ignore the "Unable to resolve host xxx" message)
- sudo reboot (Wait for reboot then log back in)
- sudo nano /etc/hosts (to open the hosts file)
- replace instances of raspberrypi with your new hostname then save as usual
Step 6 - Changing Password
Always good to change default passwords!
Step 7 - Tidy up MOTD
When you login you get loads of crap about GNU licencing etc, to remove that (or change it) (whilst keeping the usefull version info etc):
Edit as you like & save & close (Ctrl + X, Y Then Enter)
Step 8 - Backup PI
I then backed everything up that I've done so far (because next step risks breaking everything!)
- sudo shutdown now
- wait for Debian to confirm everything has stopped & entered single user mode
- power off the pi and remove card
- install card into PC
- start the "Win32 Disk Imager" software we used in step 1
- give the image path a name and select your card as the device
- click READ (this will take ages - infact, with a 32gb card i think it would have been quicker repeating steps 1-7 if something went wrong....)
Step 9 - Resize partition
I got a 32gb card, the default image you applied in step 1 only uses 2gb of it and leaves the rest unpartitioned, to use that unpartitioned space:
- reboot & log back in
- df -h (note the volume size of your root volumes)
- sudo fdisk -uc /dev/mmcblk0 (take note of p2 start sector)
- p
- d (delete partition)
- 2 (partition 2)
- d
- 3
- n (New partition)
- p (of type primary)
- 2 (new partition number
- enter start sector noted in step 3)
- leave end sectore blank to use default
- w (saves all changes)
- reboot & log back in
- sudo resize2fs /dev/mmcblk0p2 (takes a while)
- df -h (to confirm new volume sizes)
- cd /var (switch dir)
- sudo dd if=/dev/zero of=swapfile bs=1M count=128 (takes a while)
- sudo mkswap /var/swapfile (takes a while)
- sudo swapon /var/swapfile (takes a while)
- reboot & log back in
- sudo nano /etc/fstab
- replace contents with this:
proc            /proc   proc    defaults                        0 0

/dev/mmcblk0p1  /boot   vfat    defaults                        0 0

/dev/mmcblk0p2  /       ext4    defaults,noatime,nodiratime     0 0

/var/swapfile   none    swap    sw                              0 0
- reboot & log back in (df -h again if you want to confirm everything is OK)
Source: http://www.youtube.com/watch?v=R4VovM...4VovMDnsIE
Step 10 - Apache time
This is pretty much a normal linux install using apt-get, first, update apt-get
- sudo apt-get update (takes a while & might finish advising you to run it a 2nd time, go ahead and do that)
- sudo apt-get apache2 (enter Y to confirm) (Takes a while - ignore the startup errors at the end)
- cd /etc/
- ls -l (note the new apache2 dir in the list)
- cd apache2 (to select that new folder & make sure it exists etc)
- cd /var/www/
- ls -l (just to check the www root folder has been created and the index.html file written)
- cd /etc/apache2
- sudo service apache2 start (this should give an error about a bad group name)
- sudo nano envvars
- locate lines:
export APACHE_RUN_USER=www-data

export APACHE_RUN_GROUP=www-data
- Replace with: (if you're using putty you can highlight the existing lines then just right-click the selection to auto-copy/paste)
# export APACHE_RUN_USER=www-data

# export APACHE_RUN_GROUP=www-data

export APACHE_RUN_USER=pi

export APACHE_RUN_GROUP=pi
- Hit Ctrl+X to exit, when prompted to save hit Y then Enter to confirm the filename
- sudo nano httpd.conf
- Add line:
- Hit Ctrl+X to exit, when prompted to save hit Y then Enter to confirm the filename
- sudo service apache2 start
- hit a web browser on another pc and go to http://192.168.0.XXX
- Note: as default, all site files should go in /var/www)
Step 11 - Installing php5
- sudo apt-get install php5
- y (then wait a good while)
- php -v (just to check it installed & version)
- sudo service apache2 restart
Step 12 - Installing mysql
- sudo apt-get install mysql-server mysql-client
- sudo apt-get install php5-mysql
- sudo service apache2 restart
Step 13 - Installing phpmyadmin
apt-get wont work for the pi as it assumes a default group "www-data" that does not exist in the squeeze
Quickest way is to install manually:
- Download zip from http://www.phpmyadmin.net/home_page/i.../index.php
- extract to your www folder (i used a sub folder called db)
- create a blank writable folder within the phpmyadmin folder called config
- Navigate to http://192.168.0.xxx/db/setup
- If it says that various php items are missing (mcrypt etc) install these as follows:
sudo apt-get install php5-mcrypt
- Click "Add Database" and use the default localhost settings, click save.
- On the setup main screen, click the Save button again, this will write the finished config to the /config folder, move this into the root of db (or whatever you called your phpmyadmin folder)
- login with root / whatever mysql password you used when installing mysql
Step 14 - Installing webmin
This is easy:
- cd /etc/apt
- sudo nano sources.list (Add the following lines:)
deb http://download.webmin.com/download/repository sarge contrib

deb http://webmin.mirror.somersettechsolutions.co.uk/repository sarge contrib
- cd
- wget http://www.webmin.com/jcameron-key.asc
- sudo apt-key add jcameron-key.asc
- sudo apt-get update (twice if needed)
- apt-get install webmin (takes a whilst as it needs to isntall pearl)
Job done
Edited by admin on 01-07-2012 22:19
Jordon Pilling | Heavencore Administrator
|